I swear Hairstylist's are speaking another language... Help

How many times have you walked into a salon and your Stylist starts using words, phrases and numbers you don’t understand even the slightest? Trust me, even as a Hair Stylist it’s hard to keep up with all the terms and new techniques! I’m here to enlighten you a bit about these terms in hopes that it’ll help you to better understand the lingo when speaking with your Hairdresser.
What are levels and tones?
Before we jump into what technique terms are used in the salon, I felt that we should go over the most commonly used words like “Levels” and “Tones”. Here’s a little mini crash course on what these two terms mean!

Hairdressers speak about hair in forms of levels. In Beauty School, Hair Stylists are taught that there are 10 natural levels of hair. Please refer to the chart to the left!
The chart shows Level 1 being Black and Level 10 being Lightest Blonde. These levels help Hairdressers to understand our starting points when formulating color for your hair and what we need to do to change your level of darkness or lightness.
For example, if a guest is naturally at a Level 5 [Light Brown] and they want a Balayage at a Level 8 [Light Blonde], we now know we need to achieve 3 Levels of lift to get the results the guest wants.
The max amount of lift that can be achieved in one session will depend on whether our guest has previous color in the their hair, if any. However, in the perfect scenario we can usually achieve 3-4 levels of lift in one session. For this reason a lot of Stylists will suggest multiple sessions in order to achieve a guests desired result!
Every level has an undertone and these range from Red to Pale Yellow, as shown above in the chart. These undertones help us formulate the toners needed for a guests desired outcome.
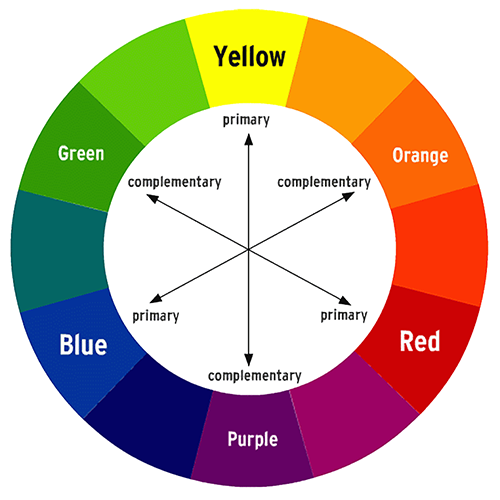
Let’s refer to the chart on the right, which is a typical color wheel you learn in Art Class. As mentioned above Underlying Pigments are tones we are left with after your hair has been lifted. So yes, even at a level 10 you will still see warmth [Pale Yellow]. Toners are what we use to remove these warm tones! If you draw a line from green to red, above the line are warm tones and below the line are cooler tones.
Earlier we discussed a hypothetical scenario where a guest who was a Level 5 [Light Brown] and wanting a Balayage at a Level 8 [Light Blonde]. This guest wanted to be on the cooler side of the spectrum with no warmth. The underlying pigment of a Level 8 is Yellow or Yellow/Orange. Hairstylists will take this note and formulate a toner with a Violet/Blue base to achieve that perfect cool toned blonde! Opposites on the chart neutralize, so a Violet/Blue toner will neutralize a Yellow/Orange undertone.
I know a lot of info, but don’t stress to much as it’s really my job to understand this! However, I wanted to quickly explain how these Tones and Levels work so that you can better communicate with your stylist when they ask what you prefer.
What about all these color technique terms?
Let us now get into what we really came here for… Hair Coloring Techniques! I’m sure you have heard a Stylists use terms like “Color Melt, Root Shade, Babylights, or Highlights”, but what the heck do they mean?! As mentioned earlier, these terms are even hard for me as a Stylist to keep up with as new names and techniques come out every day, but let’s go over the most important ones!
Color Melt
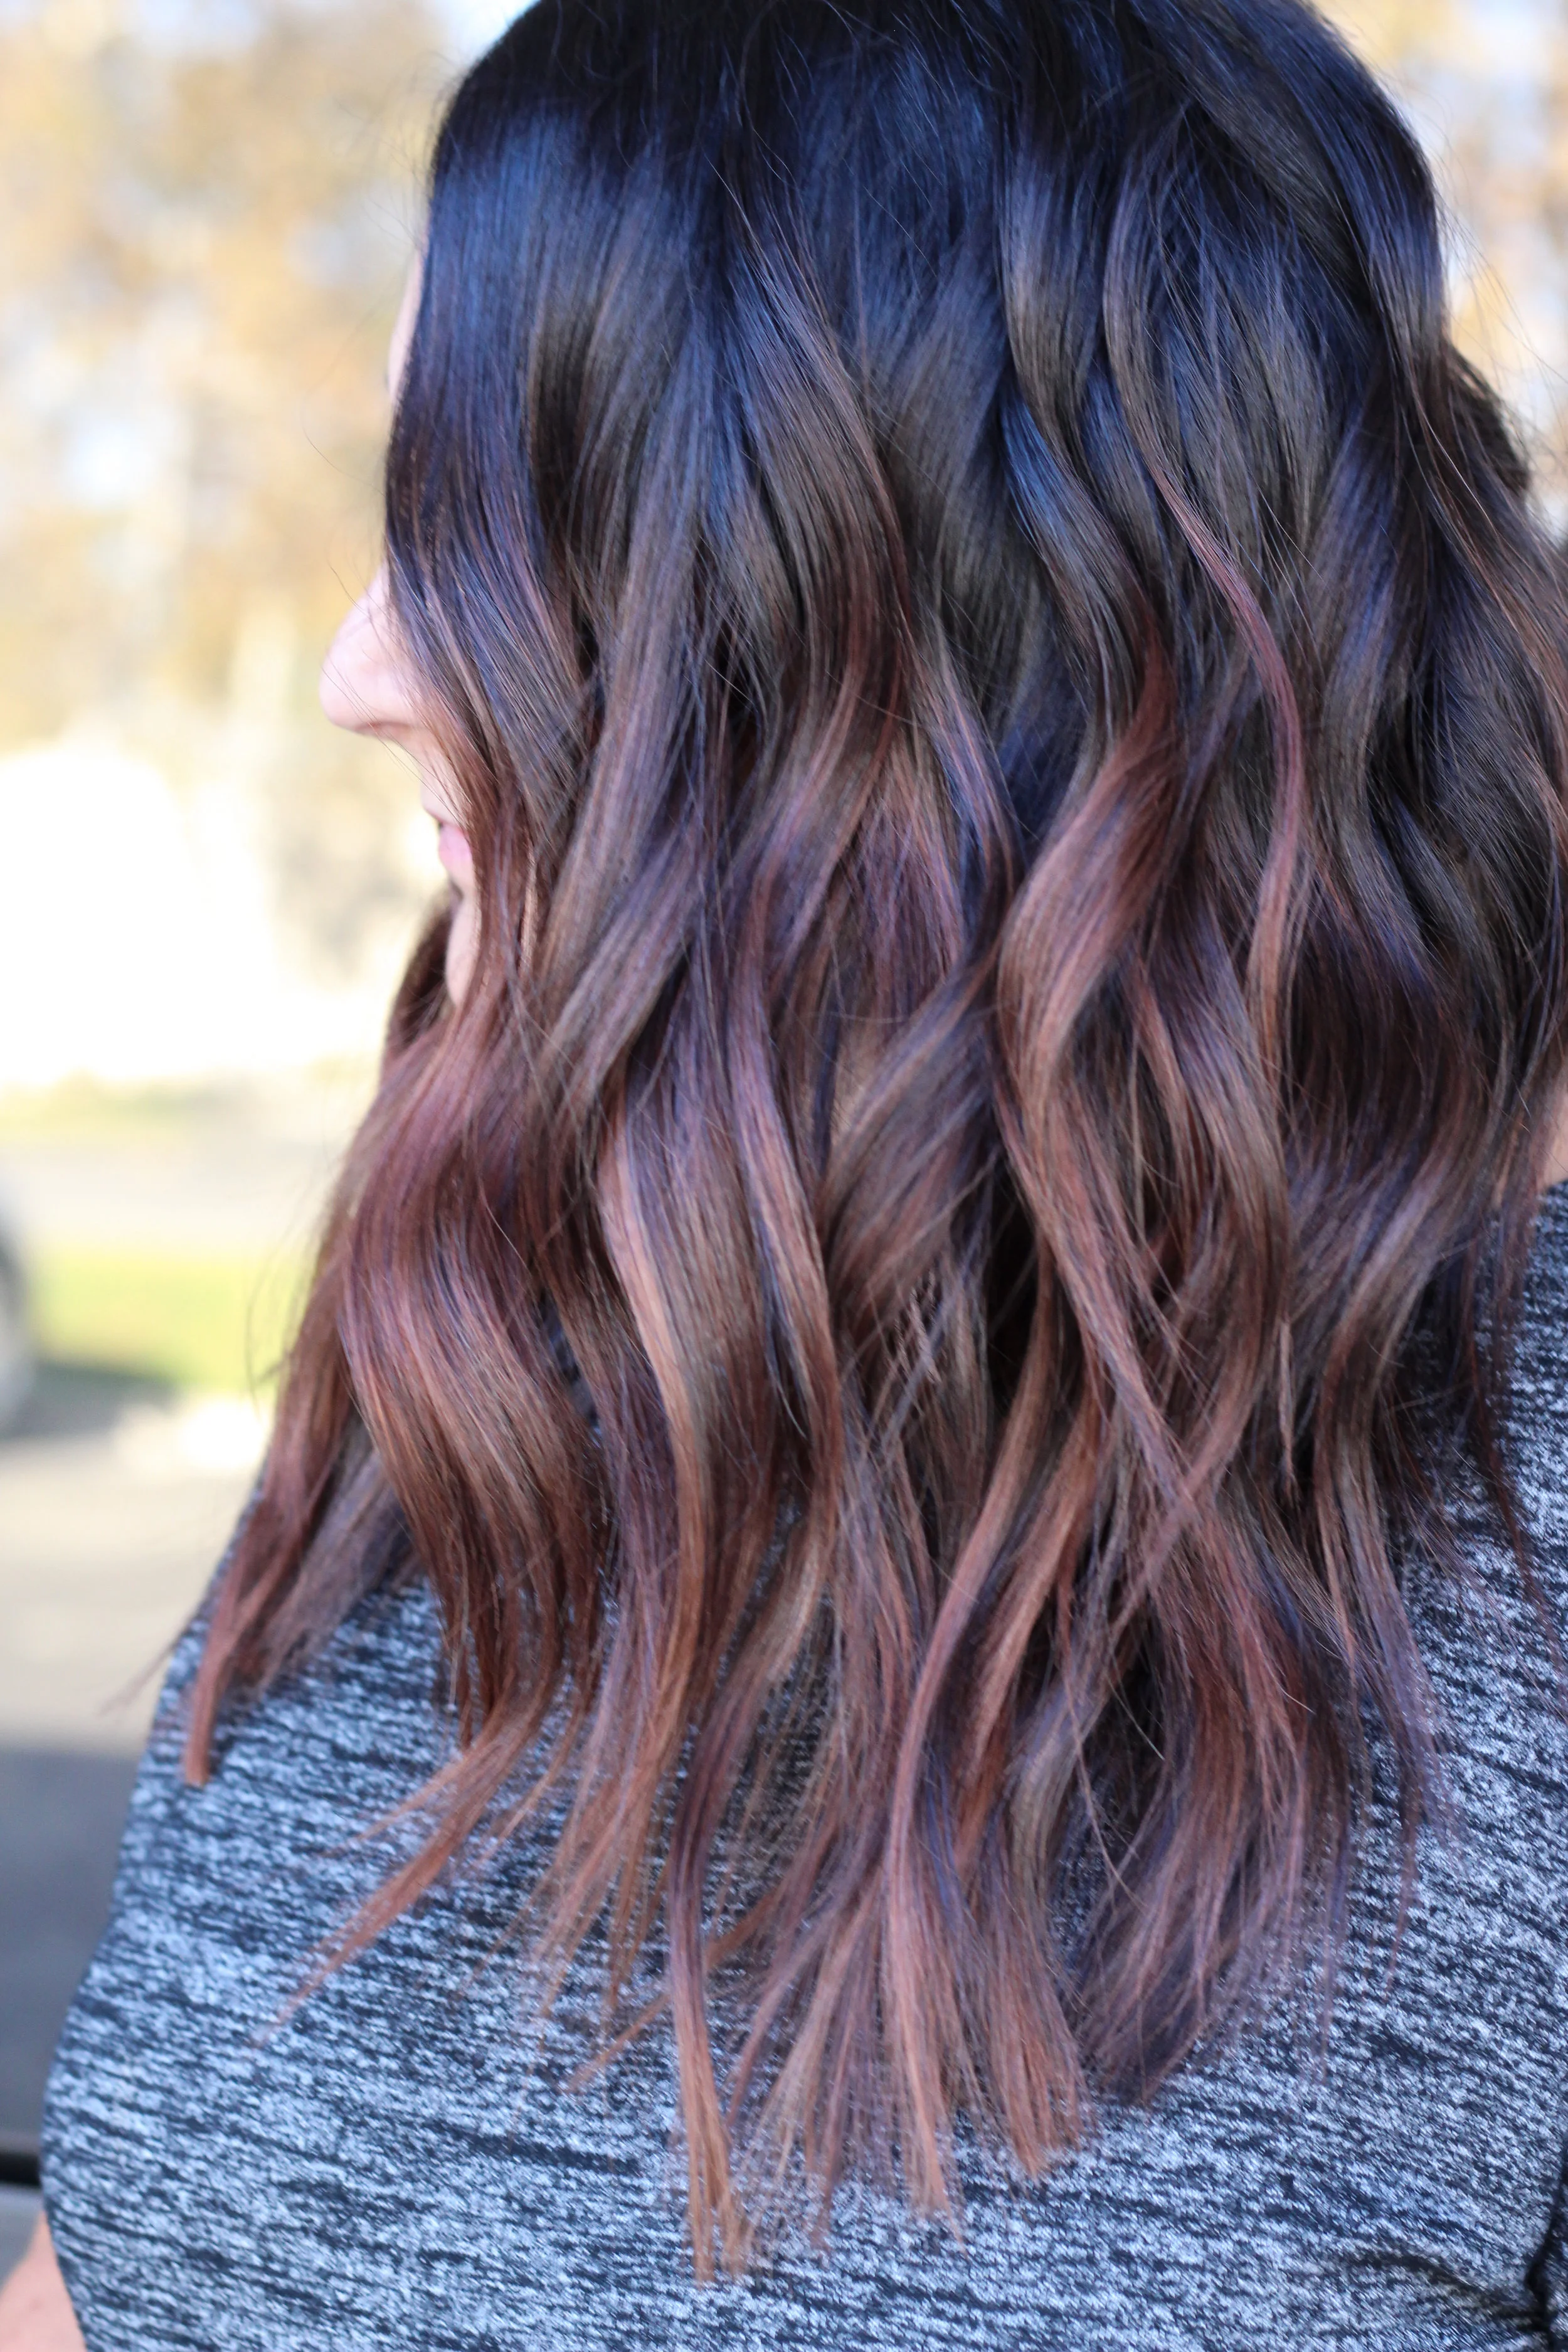
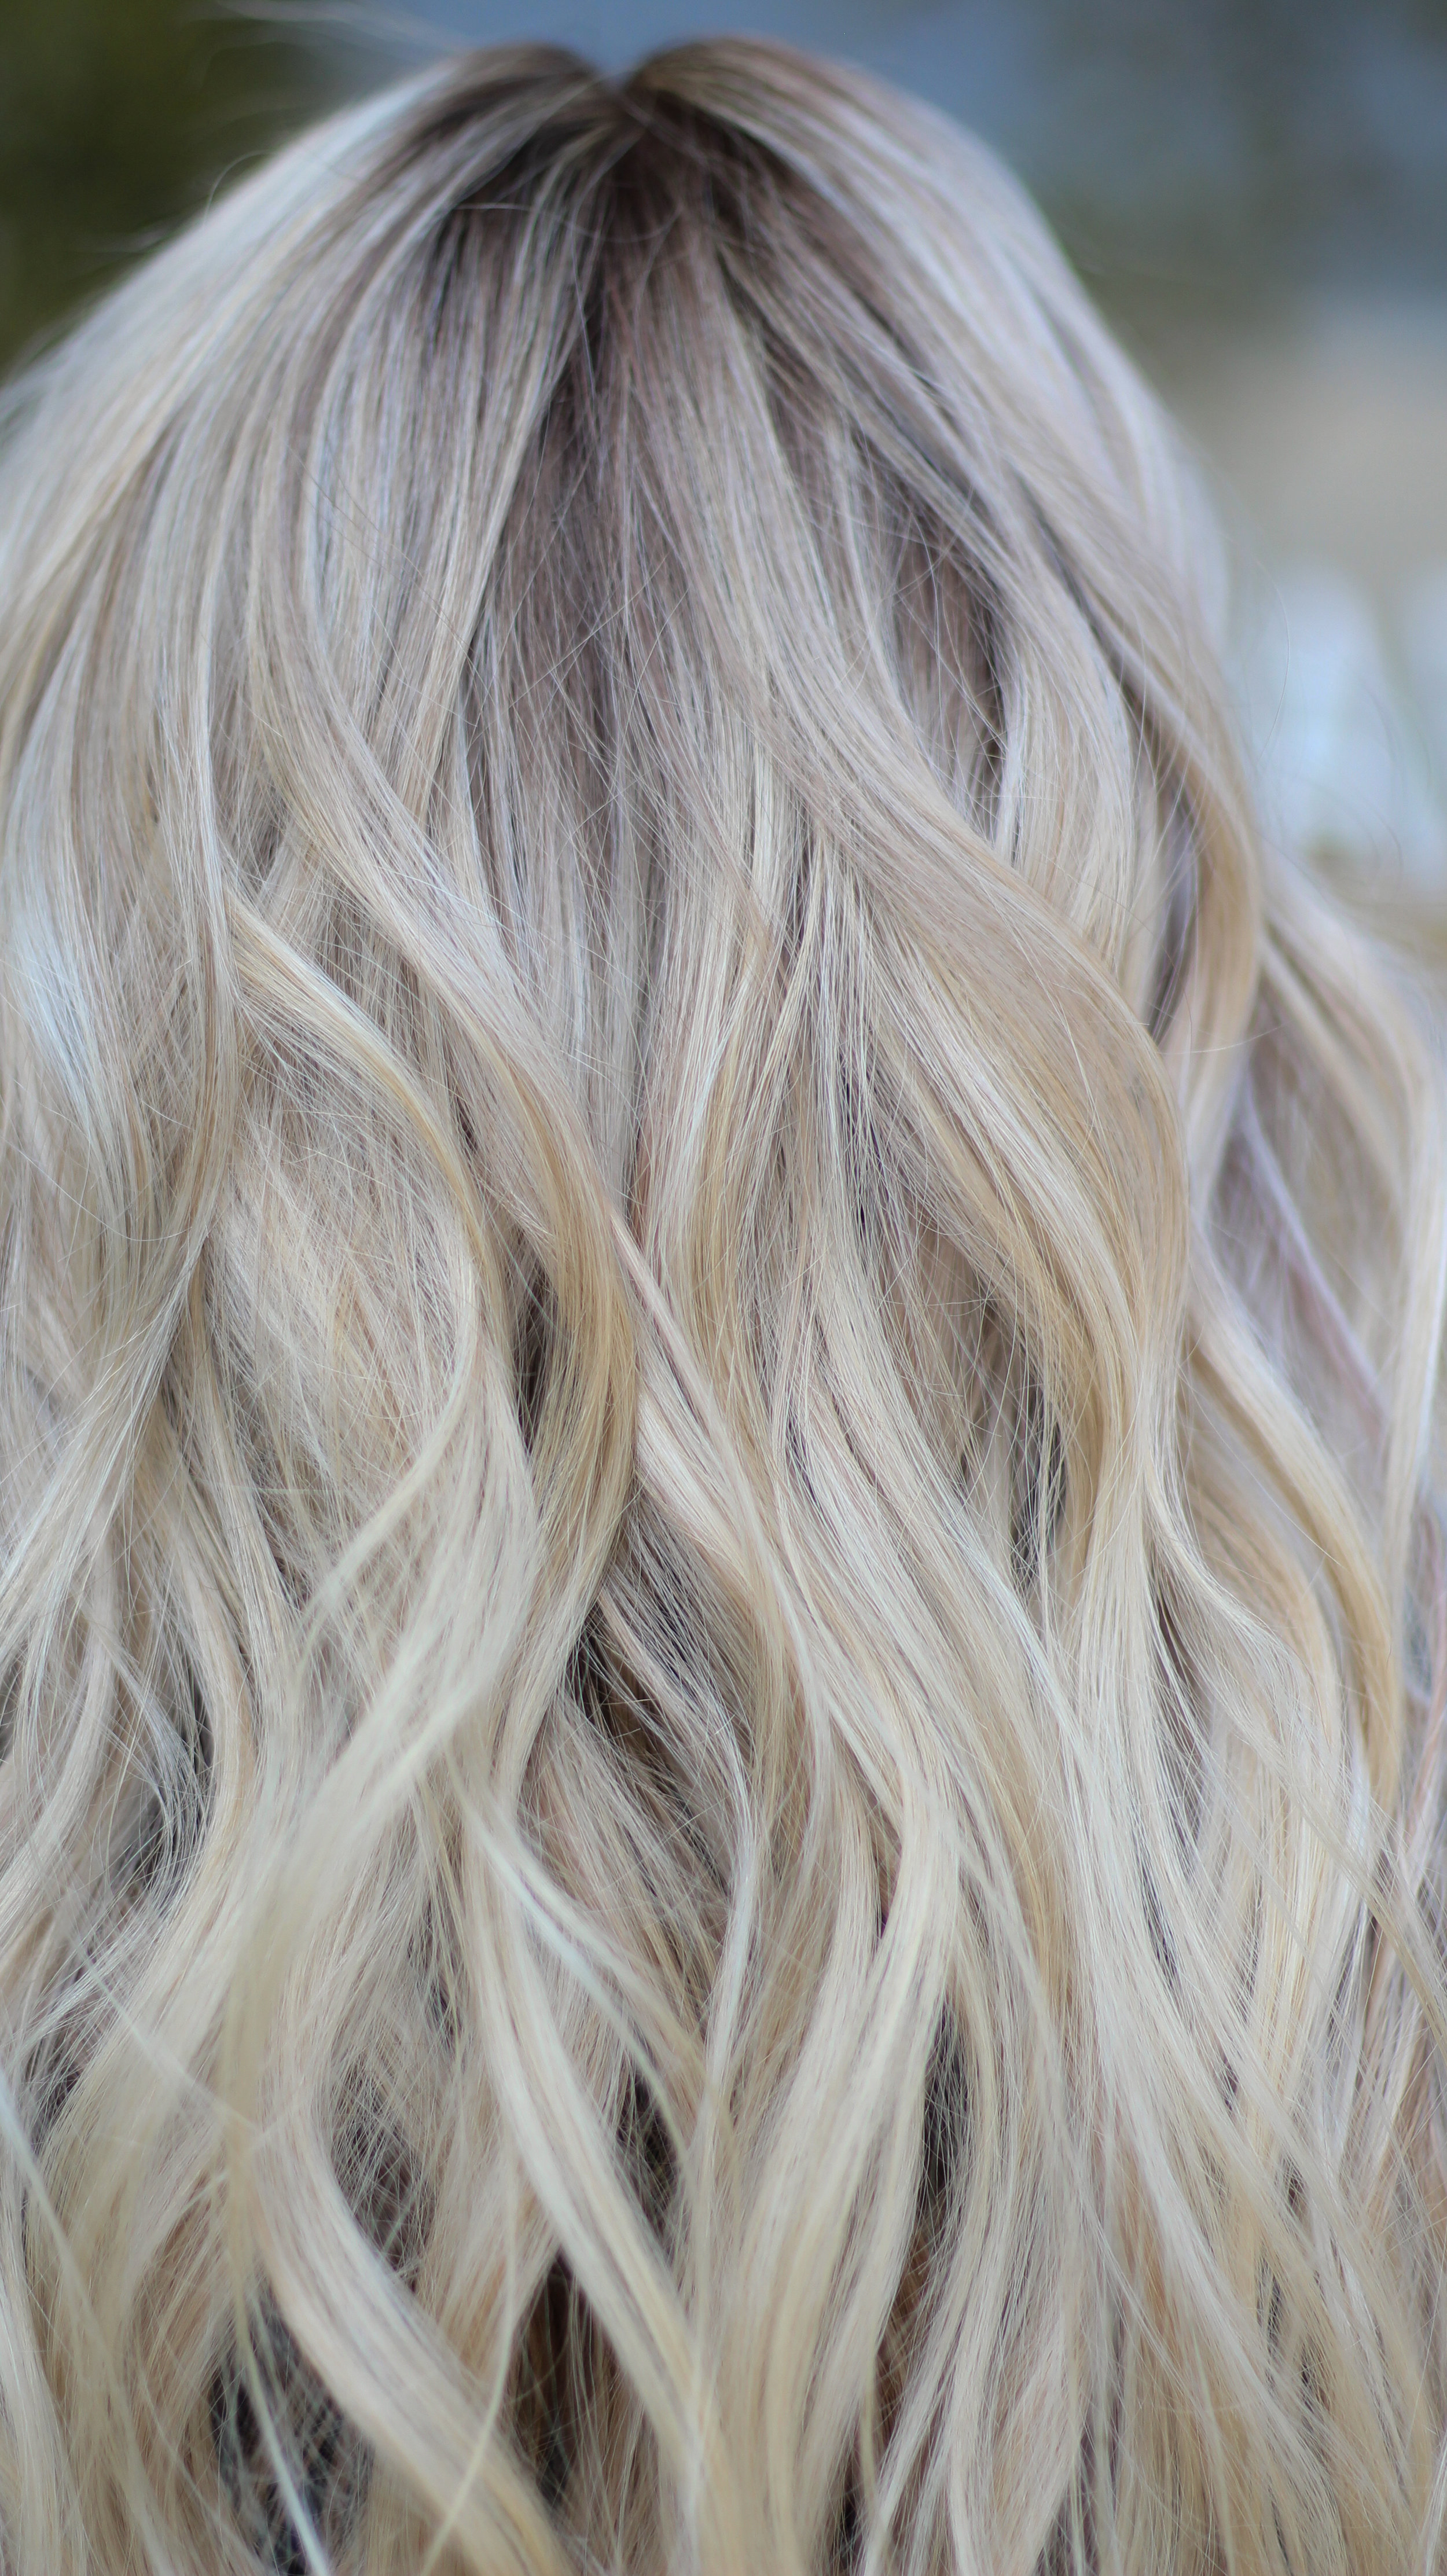
A Color Melt is one of the most common terms used these days and can also be called a number of other names. Some of these names include: Root Stretch and Ombre. The term Ombre was where this term was derived from when it appeared a few years back. Essentially a Color Melt, or Ombre, is a gradient blend of color from dark to light. Please refer to the image to the left.
You’ll notice that her roots are dark, no highlights through the top, into a mid color and then light into her ends. It’s a perfect gradient blend!
This technique is used to help blend color and make it appear more natural. When I Balayage I use this technique to blend from a guests natural color into beautifully Balayaged ends. It makes for a much easier grow out and way less maintenance. I also love to use this technique to blend out old highlights or balayage that a guest may want to grow out, which was actually the case with my guest in this image!

Babylights
We all know what Highlights are at this point, as they have been around for decades, but what the heck is a Babylight? Over the years many hairdressers have moved into creating more natural and seamless work to bring down the amount of maintenance for their clients. This is because our techniques have become so extensive and expensive that we needed to make it more affordable for everyone!
Well Babylights were designed to be about half the size of a regular highlight. These highlights blend perfectly into the hair and most of the time they do not require any blending, because they are fine enough to blend on their own. If this is not the case, which it can be for some, we then we have the next option.
Glitterlights
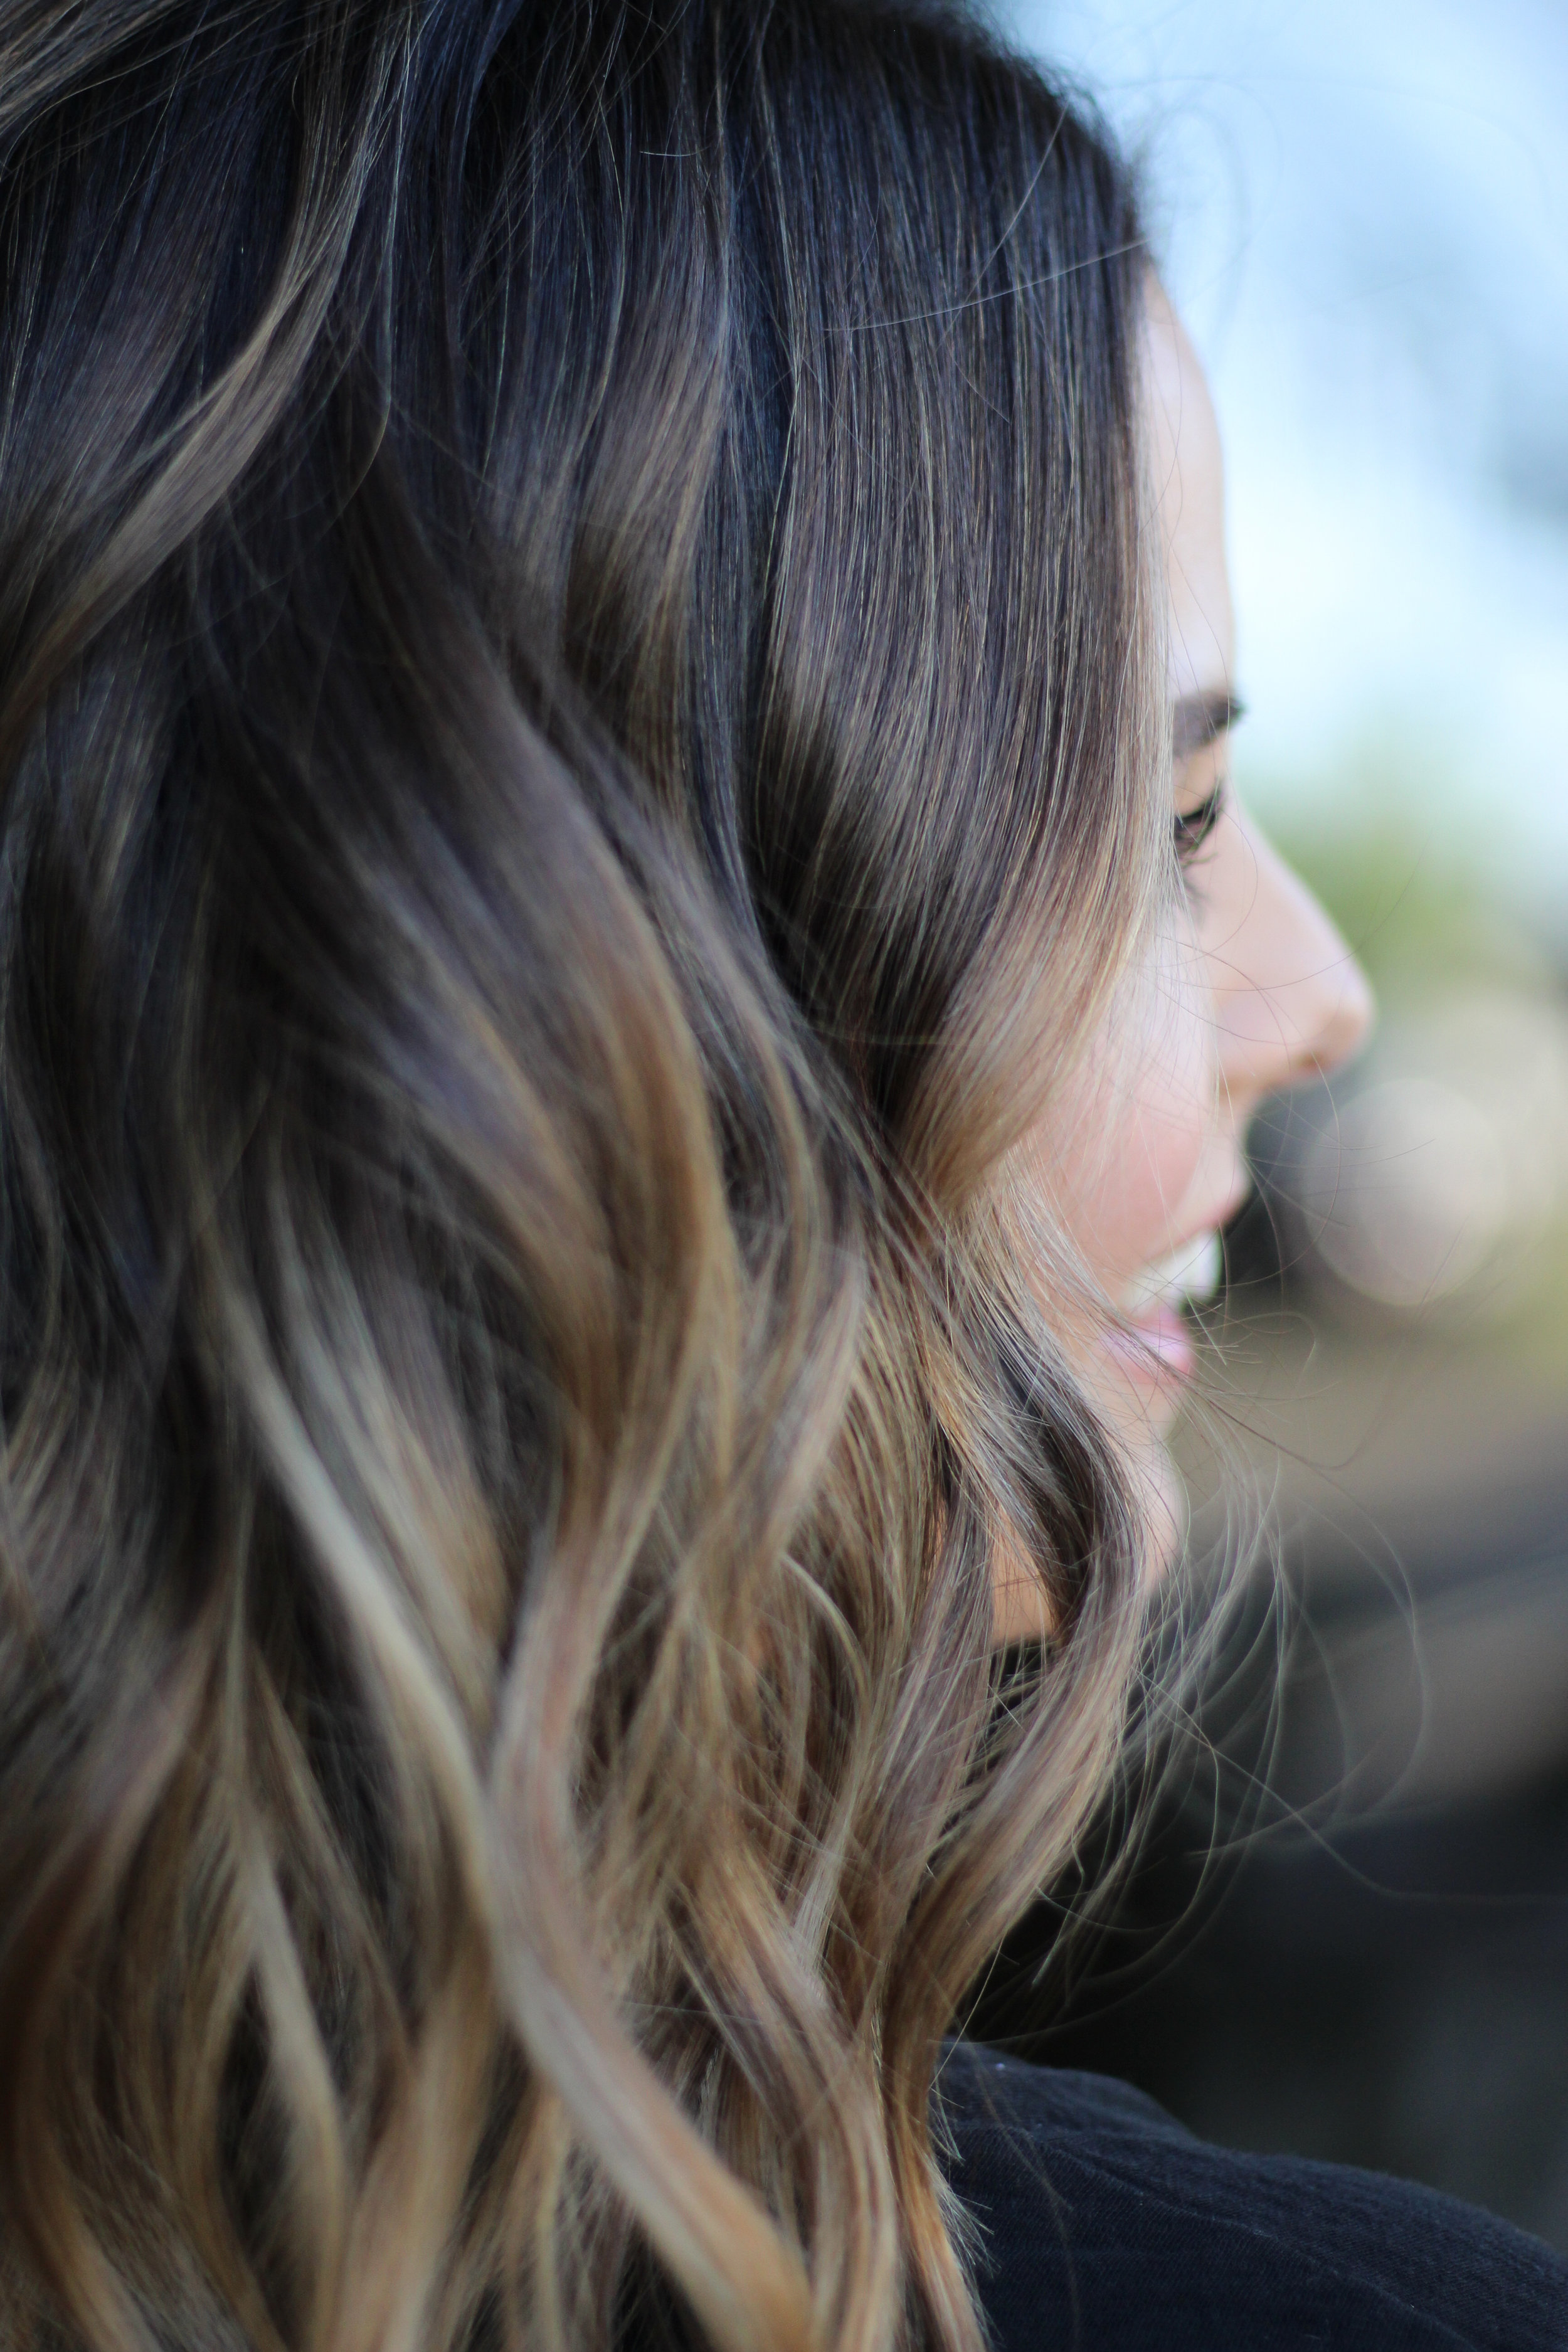
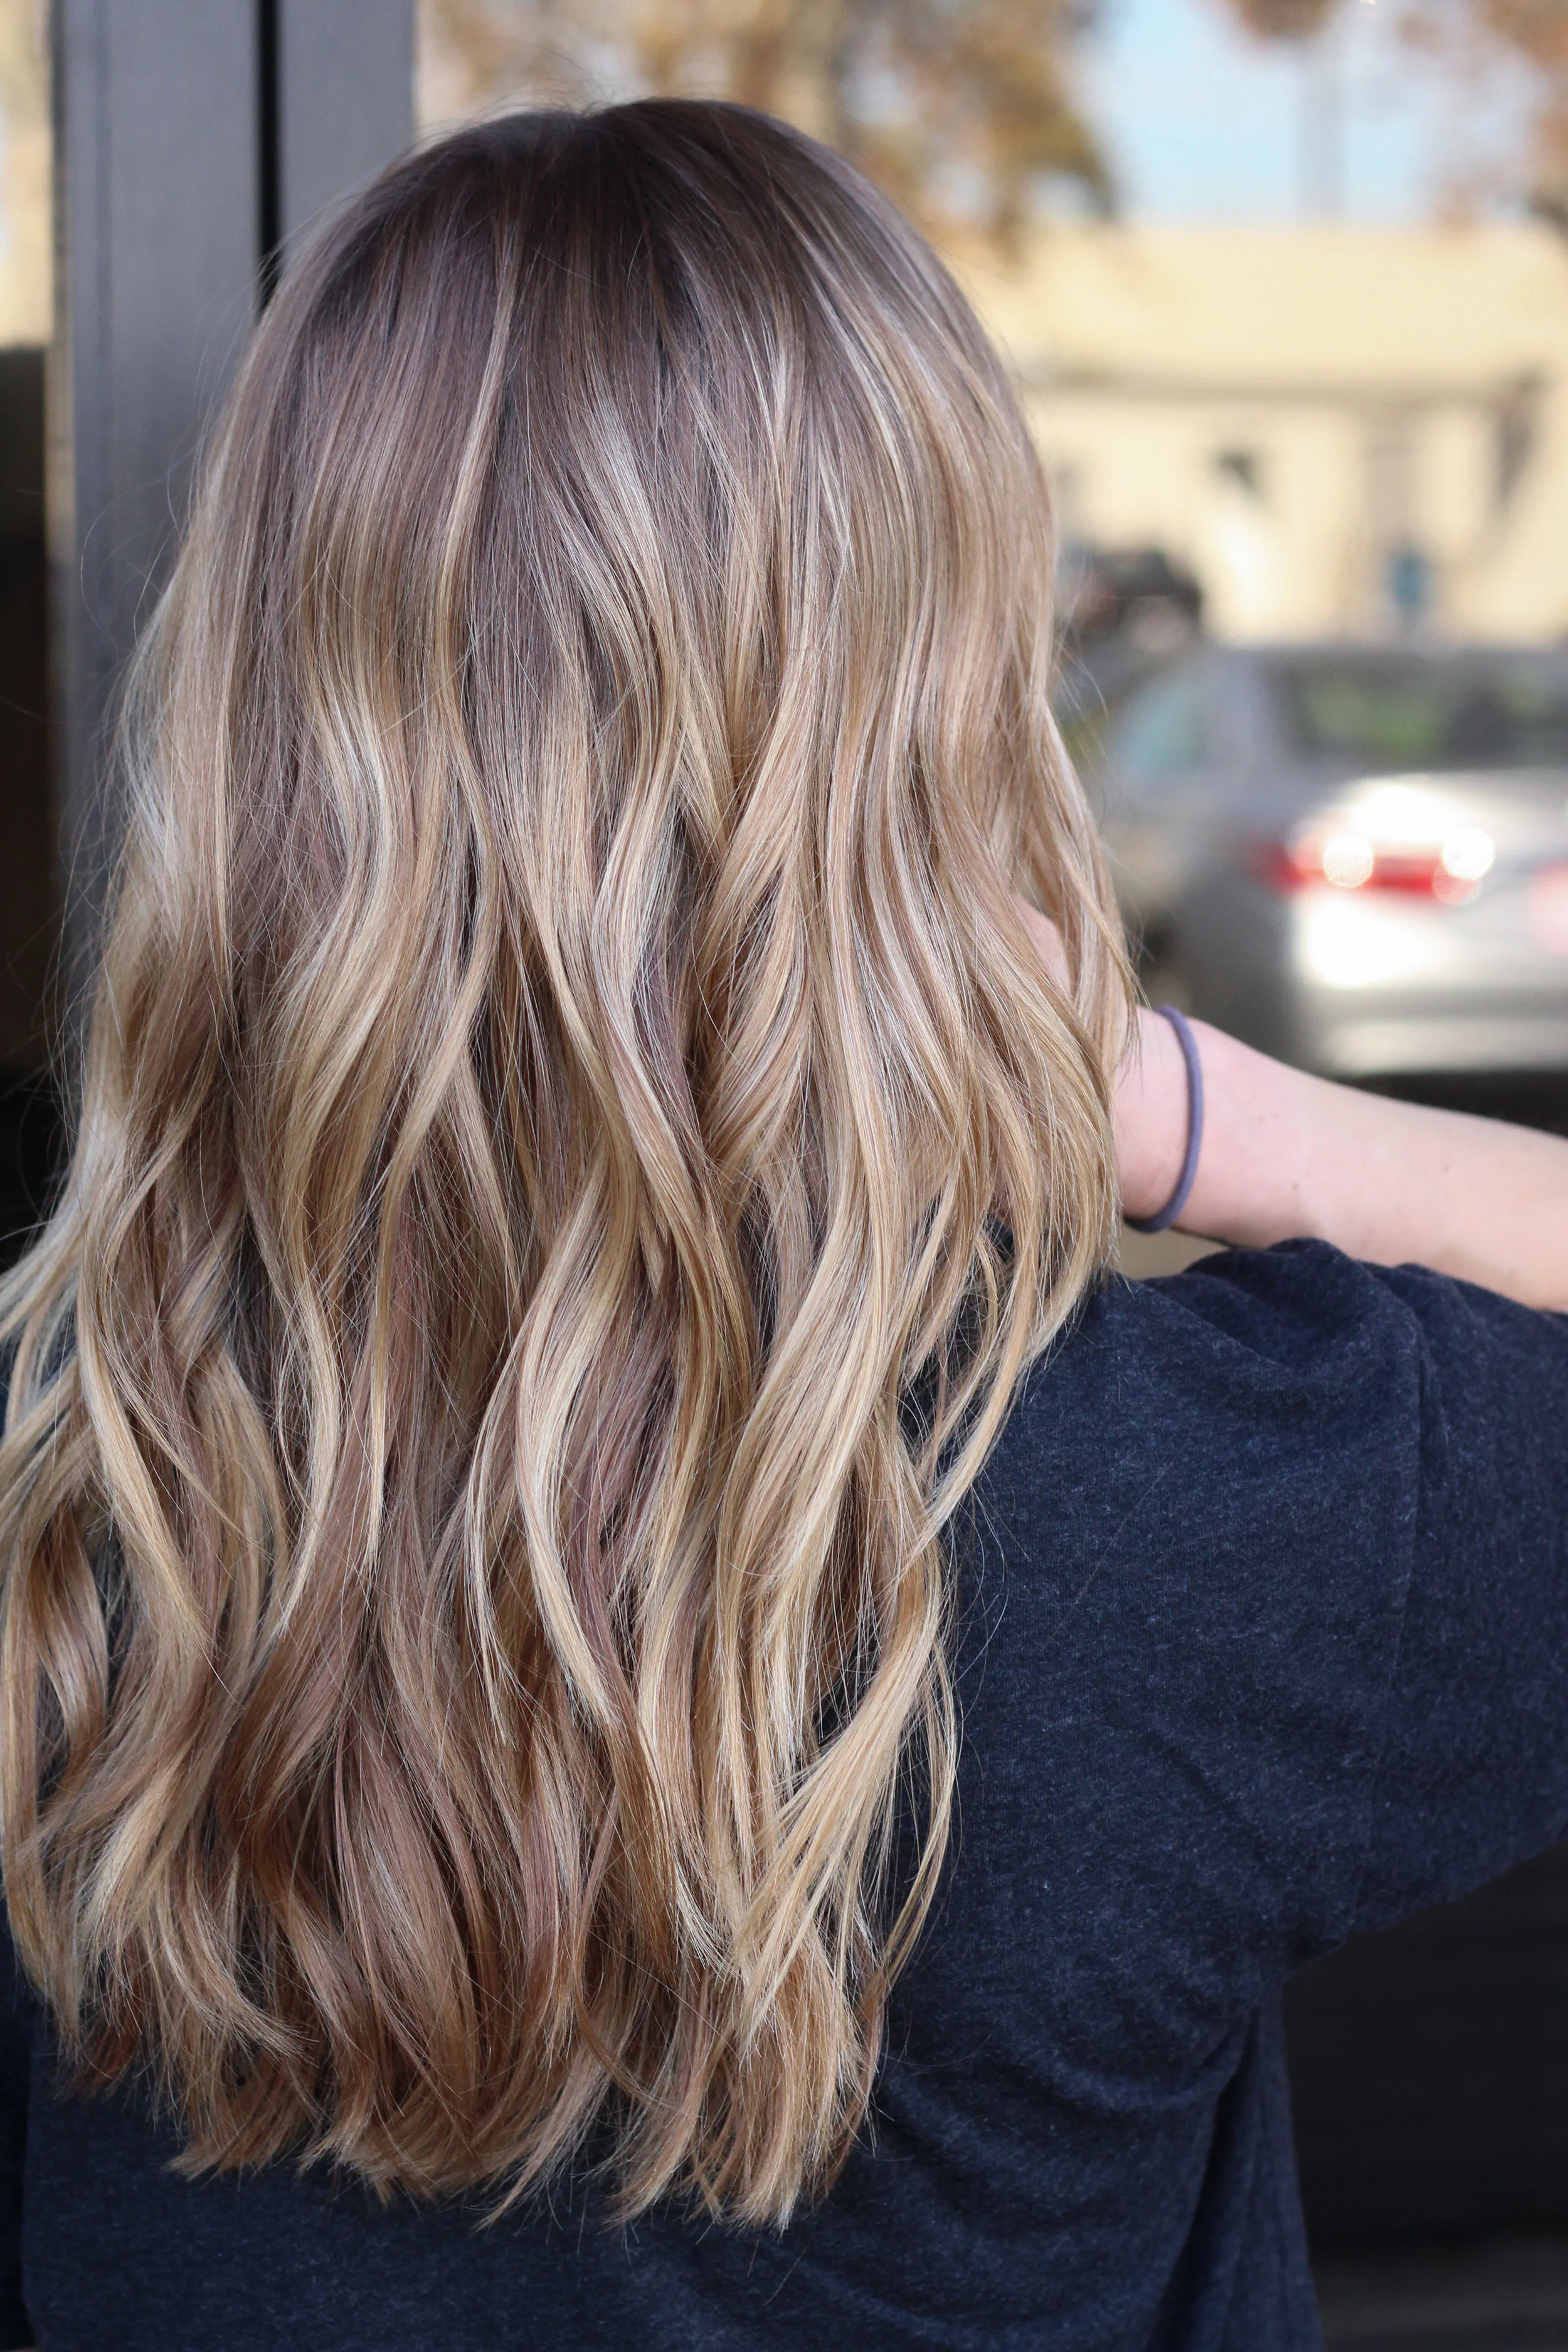
Glitterlights are my go-to on everyone because they are a quarter of the size of a Babylight! These Glitterlights mimic the natural highlights that you had as a child. No blending required and a grow out with NO line of demarcation. Minimal maintenance and seamlessly gorgeous. Say hello to less salon visits and money saved!
I typically use these Glitterlights in with my Balayage techniques to help blend my guests natural hair color down into their Balayaged ends. They also create a connecting point for that beautiful money piece and everything else! If you follow me on Instagram then you know I talk about these a lot, but if not refer to the image to the left!
The main difference between Babylights and Glitterlights would be the obvious density. Babylights are heavier and brighten up the root area. The Glitterlights are much softer and not as bright as they were created to be a blending agent more than a lightner.
Root Shadow
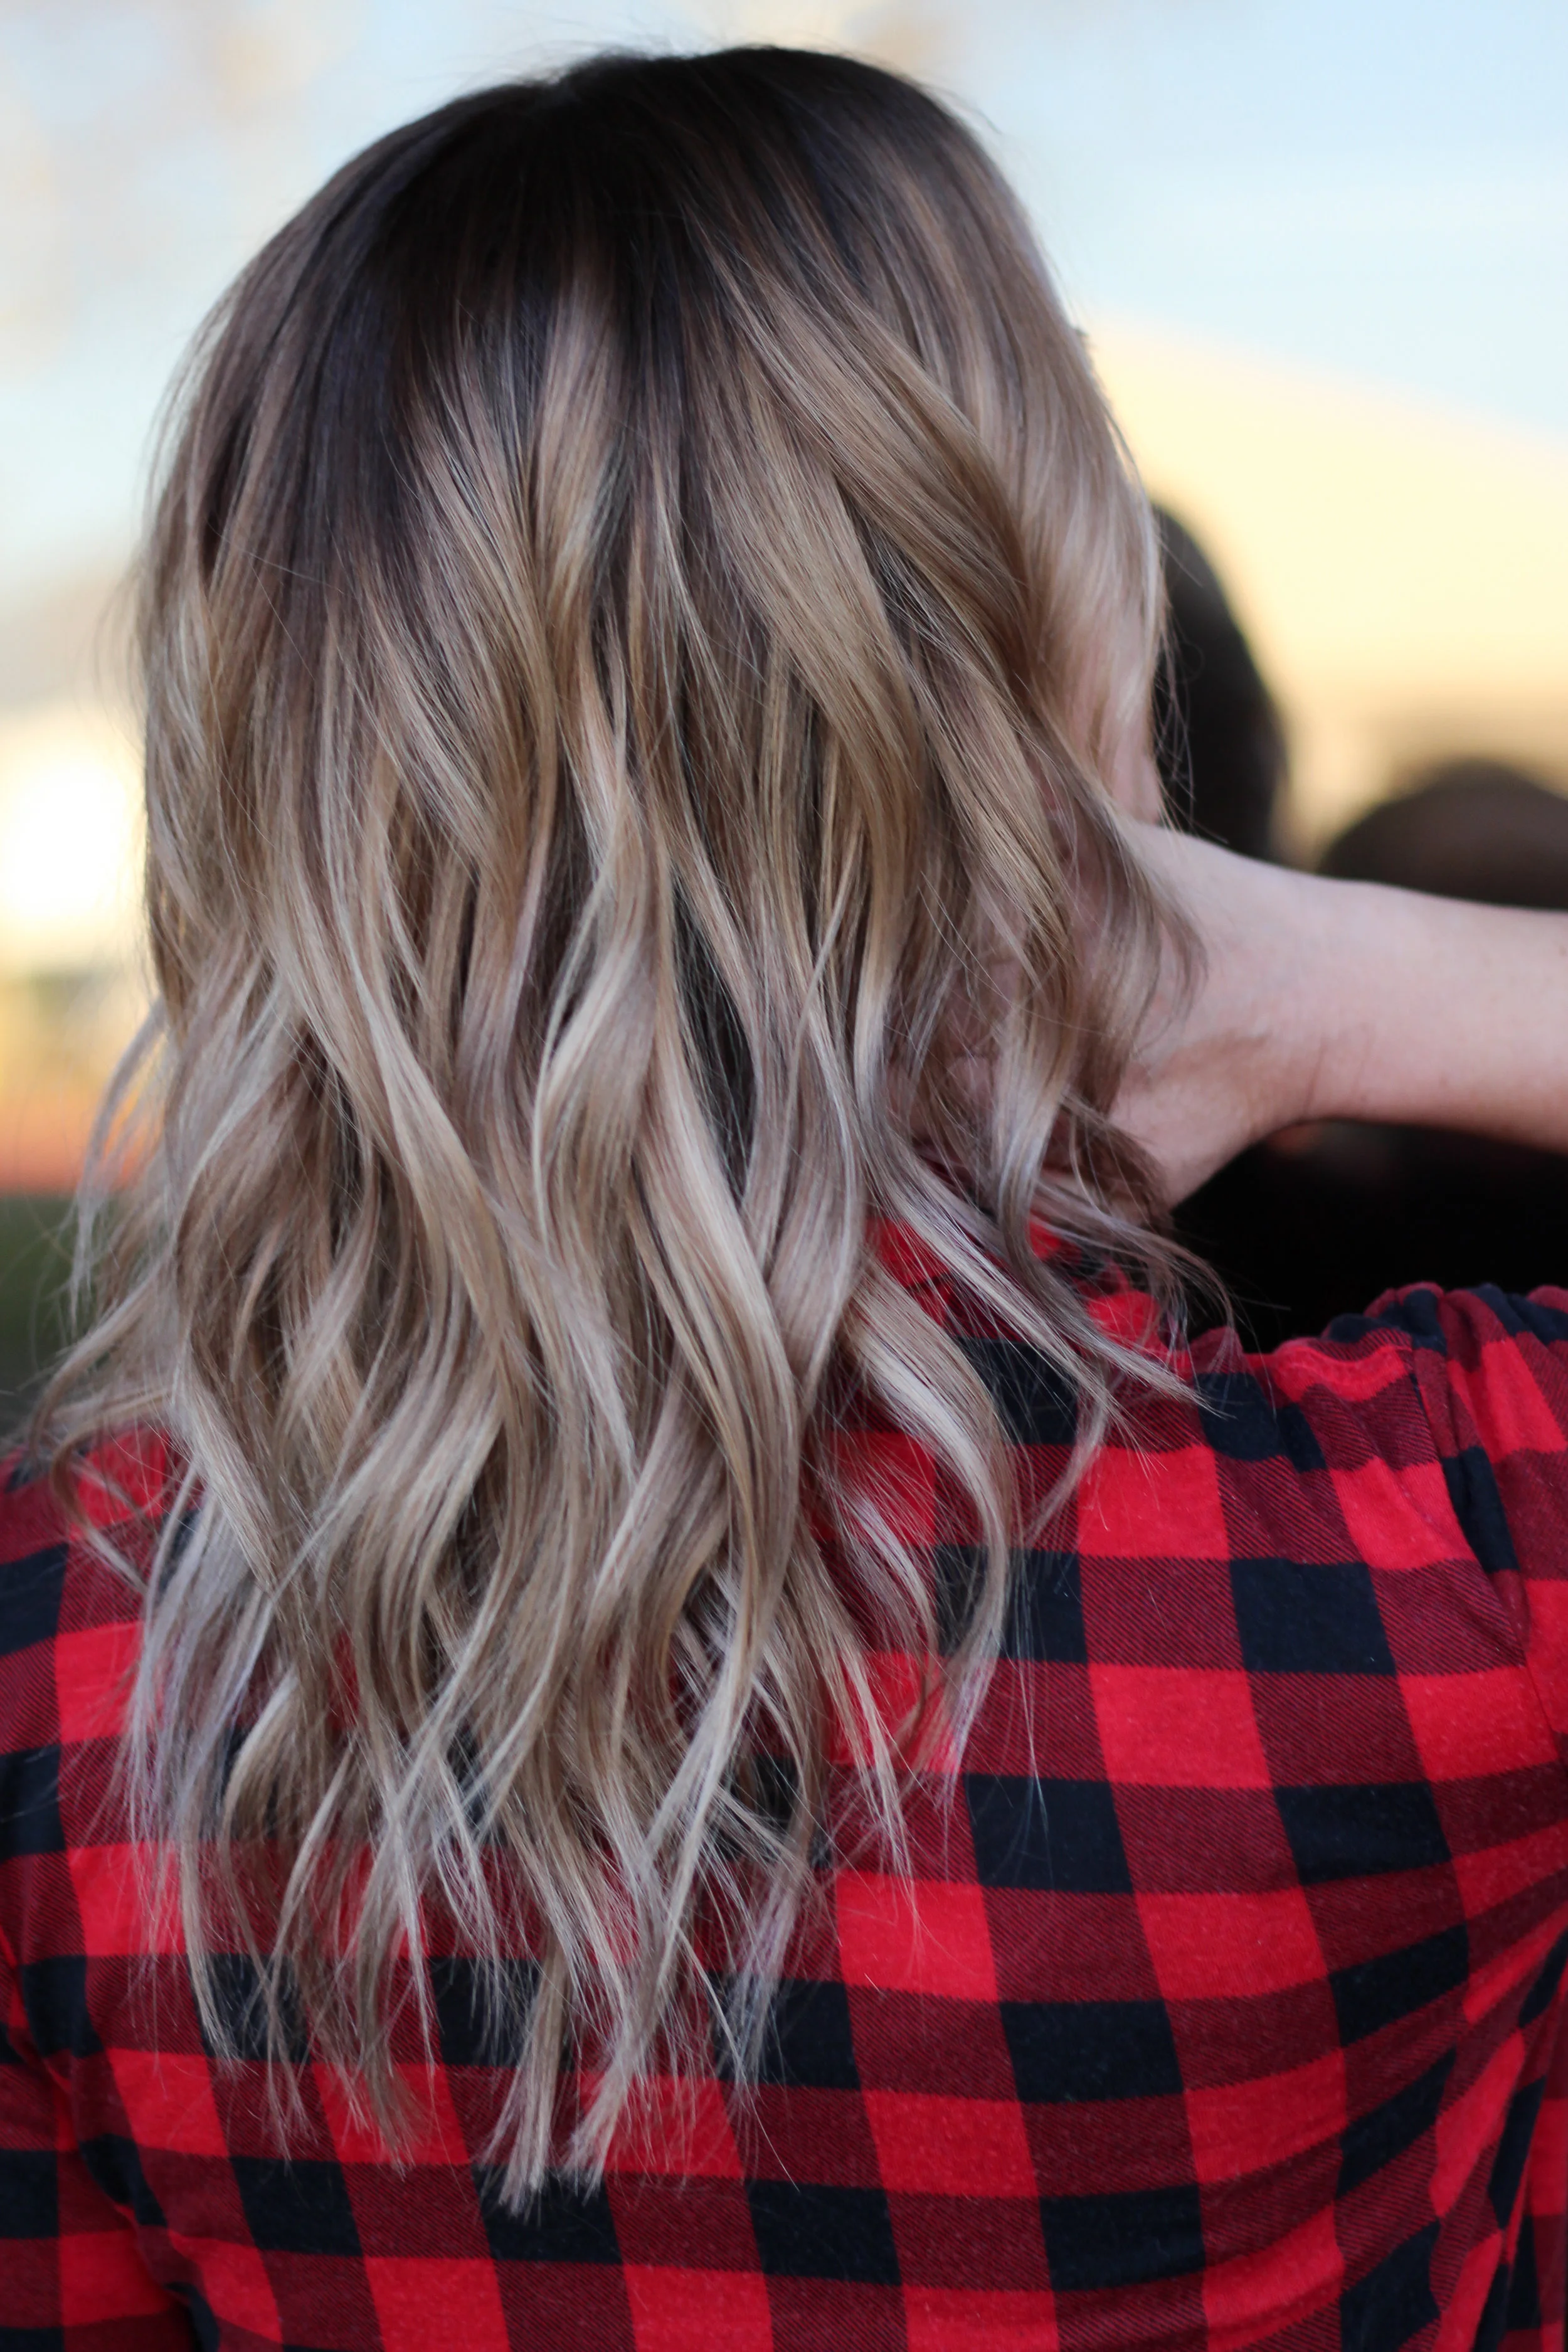
I personally use the term Root Shadow frequently in the salon and I often get puzzled looks when I do! Root Shadows are my favorite because they are a great way to blend out a root into highlights or grown out color. This technique is super similar to a Color Melt only used to a much smaller degree.
Personally I use Root Shadows with my traditional Highlight guests to help blend out any highlight lines that appear after a full foiling session. I often use these to help blend Face Framing Highlights for a softer grow out around the hairline. I have also used these to blend out a guests natural into grown out color. I have included two examples below! Left is a highlight with a baby Root Shadow and the right is a Root Shadow to blend old color.
Last but not Least… Toners
Often I get asked what a Toner is for and most wonder if they are used to lighten up color. Previously in this post I discussed Underlying Pigments and how Hairstylist’s use these underlying pigments to formulate for Toners.
Toners are used to help remove unwanted pigments that come through when bleach is used to lift the hair, and typically they are warmer pigments. Depending on what the guests desired look is [warm, cool, or neutral tones] the Stylist will create the perfect formulation to counteract those unwanted tones.
So with that being said, Toners mask over what your actual tone of your hair is and you’ll find that most toners are temporary. Toners cannot lift the hair or make you lighter, however the tones of a Toner are what make you appear lighter or darker.
For example, cool tones [Blue, Green, Purple] do not reflect natural light. However, warm tones [Red, Yellow, Orange] do reflect natural light, so they usually appear brighter and lighter. This is not the case for cooler tones as they appear darker because they do not reflect natural light. Even if your Level [1-10] of Toner [Pigment/Tone] has not changed, having an ash or cooler tone can make your hair look darker.
My favorite part about Toners are all the options! Toners cannot take you lighter but they can take you darker, warmer, cooler, or even vivid fun colors. The options are endless because they are temporary! Most Toners are Demi-Permanent which means they have smaller color molecules that fade out and don’t affect the inner cortex of the hair. This makes them easy to change and remove. Yay options! Who doesn’t love options?!
The images below are one example of what I mean! The left image is before any toner was applied. The right image was achieved by utilizing a Root Shadow and a Toner. no lightning was needed, just a change of Level and Tone!

In Conclusion…
As always I’m here to educate all of you to help you better communicate and understand the Hairdressing world! I have been a Stylist for 12 years and I cannot begin to count how many times I have guests who come in completely lost and I don’t want that for you. I want you to feel confident and educated on all these technical terms so you can better communicate with your Stylist and start getting the results you want!